Showing posts with label Silhouette. Show all posts

Thursday, March 5, 2015

Coffee House


Hello Everyone!  Today's post is all about caffeine!  How many of you crave your first coffee of the day?  Well this set is for YOU!!  Coffee House is the latest offering by JustRite Papercraft and it's perfect for all those coffee themed projects for your caffeine addicted friends and family.  :)

I've gone with something a little different by creating a 3D project with my Silhouette Cameo.  I've used the 3D Teacup Box template and cut the base pieces out of Chocolate Chip and the patterned paper is Miss Match by Kaisercraft.  I've taped it all together with X-press It High Tac Tape.

Once I've taped the box together, I've stamped the sentiment from Coffee House in Memento Rich Cocoa onto cream card and cut it out with JustRite Vintage Labels Seven Die

While it was still in the die, I've lightly sponged some Memento Desert Sand ink over the sentiment and then attached it to the front of the cup.  Next I've made some flowers out of Spellbinders Blooms Three Dies, Chocolate Chip card and some random paper that had similar colours to my other DP.  To finish I've accented with a brown bling flourish.

Want even more coffee inspired projects???  Wait until you see what the JR Girls have in store for you!
JustRite Inspiration
Michele Kovack
Eva Dobilas

Heidi BlankenshipMarisa Job

Kathy JonesKristi Schurr

Darsie Bruno

That's all from me today, thanks for visiting and hope you are inspired to stamp!  :)

Tuesday, December 9, 2014

Teacher Gift Set


Hello Everyone!  Last Friday, my eldest finished Grade 7 which means next year he is off to High School!  Grade 7 has been the final year of Primary School as long as I can remember in Queensland (although my mother tells me in her day Grade 7 was High School - the Education Dept obviously change the rules every generation or so), however this cohort will be the last to finish in Primary School, with the Grade 6 class finishing this week also heading to High School next year.  Such a strange feeling to have a child heading to High School.

Last Friday, the Grade 7's had their Graduation Ceremony which also included 10 Awards Presentation - these being Art, Mandarin, Music, Academic etc....  Finally the last award was announced, the June Hammer Memorial Award - which is given to one boy and one girl and is decided by no less than 20 staff and the winners kept a closely guarded secret by only 2-3 people.  The winners names will be engraved on the Honour Board at the school.  You can't imagine my surprise and gasp as my son's name was announced (I didn't even hear the girl's name I was so stunned - although I saw her go up on stage - Congratulations Ruth).  Needless to say, I shed a couple of tears.  We are so incredibly proud of you Zac - what an amazing young man you are growing up to be!

Now that I have had my Proud Mum moment - onto today's project!  Every year I make journals for the kids to give to their teachers (I do have others but you won't see those for a while due to the stamps I've used on them) - Zac had a male teacher who liked to torture the class with music from the 80's, so he wanted a journal in this theme.  (Not that Zac hates 80's music, he's been learning guitar to some of the songs of that era.)  You can imagine how this got my brain working - how was I going to do 80's theme?  I found some random bright, circular patterned paper deep in my stash which I thought would work, punched the edge with a spiral punch and glued it down.  I've made a black and orange panel for the front, and cut out the teacher's name in yellow and green using Spellbinders Upper Case Font One.  The guitar was cut using MFT's Rock and Roll Die-namics (I can't find it in their store - perhaps it's retired?) in a variety of colours.  Next came the cassette - I found Retro Cassette shape in the Silhouette Online Store and cut all the pieces and glued them together and attached as shown.
The card was made in matching colours, with the added use of the Music M-Bossabilities folder, the sentiment from MFT's A la Mode Rock Star set (also retired - boohoo - I miss the a la modes) which I've secured with a staple.

Stamps - Rock Star (MFT ret)
Ink - Memento Tuxedo Black
Paper - Daffodil Delight, Kiwi Kiss, Black, Tangerine Tango, Cherry Cobbler, White, Unknown DP from stash
Accessories - MFT Rock and Roll Die-namics, Spellbinders Music M-Bossabilities and Upper Case Font One, Silhouette Retro Cassette Cutting File, Silhouette Machine

Sorry this has been a long post today and thanks for hanging in there until the very end!  I hope whatever craziness is happening in your part of the world, that you remember to enjoy it and celebrate every day!

Friday, July 11, 2014

Stitched Sunflowers


Hello Everyone!!  Today's JustRite release has more beautiful florals.....this time it's SUNFLOWERS!!  Don't you just love sunflowers, such a bright happy flower and these are particularly cute because they are Stitched Sunflowers and have this lovely frame that matches the brand new Vintage Labels Eight Dies, not mention the fun sentiments that go with it! !  Now match that with the new Basket Weave Background and imagine the possibilities!!  :)

http://justritepapercraft.com/collections/2014-july-release/products/stitched-sunflowers-vintage-labels-eight


I started by downloading the Box with Round Handle by Samantha Walker in the Silhouette Store and used it to cut the base out of green bazzill.  The decorative panels were cut using Very Vanilla.  Once the panels were cut, I've stamped them with Basket Weave Background in Memento Rich Cocoa.  Next I've stamped a couple of the sunflowers, frame (two of these) and sentiment from Stitched Sunflowers in Rich Cocoa.  I've cut the frames using the matching Vintage Labels Eight Dies, the larger one I've airbrushed with G82 Copic while it was still in the die, the smaller one I've cut using the smaller die and popped it up on foam tape.  The sunflowers were coloured with Copics (Y21, Y26, Y35, Y38), cut and popped up on foam tape.  To finish I've added a piece of hessian (aka Burlap for my American friends) to the handle.

Stamps - Stitched Sunflowers Vintage Labels Eight, Basket Weave Background (JustRite)
Paper - X-press It Blending Card, Green Bazzill, Green Bazzill, Very Vanilla
Ink - Memento Tuxedo Black
Accessories - Copics, Vintage Labels Eight Dies, Silhouette Cut File, Hessian (Burlap), X-press It Foam Tape.

Want to see some more inspiration for these fabulous sets???  Pop by each of the Design Team blogs and leave them a little love!

JustRite Inspiration

Debbie OlsonEva DobilasDarsie BrunoMichele KovackMarisa JobKathy JonesKristi SchurrAngela BarkhouseMargie Higuchi

That's all from me today, thanks for visiting and hope you are inspired to stamp!!  :)  

Saturday, May 17, 2014

Pinkalious Birthday


Hello Everyone!  Today I'm going all Pinkalious!!  I never seem to have enough birthday cards......I know......what the???  Anyway, I am building my stash and thought a fun, frilly and PINK card would be good to have considering all the little girls I know.  :)

I've used a base of pink, layered with darker pink and topped with a pink spot DP.  I've created a notched tag out of pink, topped with white and stamped the sentiment from Cupcake Wishes along the bottom in Rich Cocoa.  I've used the Cupcake Wishes Digital SVG File and my silhouette to cut several candle shapes and then stamped the candles from Cupcake Wishes in Rose Bud and Angel Pink ink.  I stamp them while the die cuts are still on the sticky mat - particularly when it's a small piece like this, keeps it in place perfectly!  Next I die cut two banners out of DP using the JustRite Buntings and Button Die.  Then I cut some pink card using one of the smaller banners from the same die set.  I then stamped the Fleur Twist Background over the top in Angel Pink.

Stamps - Cupcake Wishes (JustRite)
Ink - Memento Rich Cocoa, Angel Pink, Rose Bud
Paper - Light Pink, Dark Pink, White, Tea Party DP
Accessories - JustRite Cupcake Wishes Digital SVG File, Silhouette, JustRite Buntings and Button Die, Glue.

That's all from me today, thanks for visiting and hope you are inspired to stamp!!  :)

Saturday, May 3, 2014

Bicycle Built For Two!


Hello Everyone!  Today the JustRite girls have a fun new set to show you!!  Called a Bicycle Built For Two, it can be stamped direct, used with the matching SVG cut file and used to create fun scenes or just use it on it's own!


I've used a base of Soft Sky and layered with white.  The next layer is some Kiwi Kiss and then I've created a starburst using some scraps of Basic Grey Marjolaine DP.  The beauty about the starburst technique is you can use up all those scraps!!  :)  Across the bottom I've added some grass die cuts and then cut the fence, sun and clouds using the Silhouette and attached as shown.  I've used the Bicycle Built for Two Digital Cut SVG File and cut out the bicycle shape.  While the paper was still stuck to the mat I've stamped the bike from Bicycle Built for Two in Memento Tuxedo Black and added a little colour with Y32 Copic marker.  (When it's stuck down you don't need to worry about the paper moving while you stamp!)  To finish I've stamped the sentiment from Bicycle Built for Two onto one of the clouds and popped up on foam tape.

Stamps - Bicycle Built for Two (JustRite)
Paper - X-press It Blending Card, Soft Sky, White, Kiwi Kiss, Basic Grey Marjolaine DP
Ink - Memento Tuxedo Black
Accessories - Silhouette, JustRite Bicycle Built for Two Digital Cut SVG File, Silhouette files from the Silhouette Online Store, Copics, X-press It Foam Tape.

Don't miss all the fun and fabulous projects the team have for you today!!

JustRite Inspiration
Darsie Bruno
Marisa Job
Eva Dobilas
Kathy Jones
Debbie Olson
Sheri Holt
Kristi Schurr
Michele Kovack
Angela Barkhouse
Margie Higuchi
Heidi Blankenship Kazan Clark

That's all from me today, enjoy the hop and hope you are inspired to stamp!  :)

Tuesday, April 8, 2014

Happy 40th!


Hello Everyone!!  Today I have a different sort of card to show and I've made it for my brother who turns 40 this week!  :)  I've seen a few of this box cards around (and they fold FLAT to fit into a standard size envelope, how cool is that!) and thought I'd have a go making one since it's a biggish occasion! 

I actually found this download file at the Silhouette Store called Box Card: Birthday 30, 40, 50 (yes, it has all three ages as part of the download file! There are also other downloads for other ages.) by Lori Whitlock.  If you don't have a Silhouette, then you can follow the Pop Up Box Card Tutorial by the amazing Dina Kowal at Splitcoaststampers!


I simply cut out all the pieces in a variety of colours and used a piece of masculine type heavy DP from my stash and glued it all together.  It was fun and something a bit different for me and I hope he likes it, even if I am reminding him that's he's now hit the big 4-0!  LOL!!  I did write a little birthday wish for him on the front panel, just forgot to photograph it *before* I wrote it, so I've just blurred it, the cardstock was plain white!  ;)

Stamps - NONE (GASP!)
Paper - Brown, White, Red, Blue, Yellow, Green, DP
Ink - NONE
Accessories - Silhouette Store Download File, Silhouette, Glue

That's all from me today, thanks for visiting!!  :)

Saturday, April 5, 2014

Gift Card Thank You!


Hello Everyone!!  Today's project is one that is a little different for me - I've used a Silhouette File from the Silhouette Online Store to cut this cut Present Gift Card Holder and then stamped it with Quilted Circles Background Stamp and Burlap Background Stamp and created a thank you tag with Congrats Vintage Labels Three and Seven.


I had to make a thank you for a male friend (and we all know how difficult those MAN CARDS are!) and found this fun Present Gift Card file in the Silhouette Online Store and thought it would be perfect.  :)  I've cut the present out with blue card and the ribbon/bow accents in yellow.  I've stamped the blue present with Quilted Circles Background (in Memento Rich Cocoa) and then coloured parts of it in yellow and blue Copic.  Then I stamped the ribbon/bow with Burlap Background (in Memento Desert Sand).  The sentiment is from Congrats Vintage Labels Three and Seven, stamped in Rich Cocoa and made into a notched tag.  Super quick and easy!!  :)

The inside looks like this.....

We did add a little white panel opposite the gift card where my son wrote his message, thanking our friend for helping him get to and from cricket games during the season.  :)

Stamps - Burlap Background, Stitched Circles Background, Congrats Vintage Labels Three and Seven (JustRite)
Paper - Blue and Yellow Card
Ink - Memento Rich Cocoa, Desert Sand
Accessories - Present Gift Card Silhouette File, Silhouette Machine, Scissors

Let's see what other fabulous inspiration the JustRite Team have today!!
JustRite Inspiration
Marisa Job
Becca Feeken
Kazan Clark
Kellie Fortin
Heidi Blankenship
Michele Kovack
Kathy Jones
Angela Barkhouse
Kristi Schurr
Eva Dobilas
Darsie Bruno
Margie Higuchi
Sheri Holt

That's all from me today, thanks for visiting and hope you are inspired to stamp!!  :)

Monday, March 31, 2014

Good Thinking!!


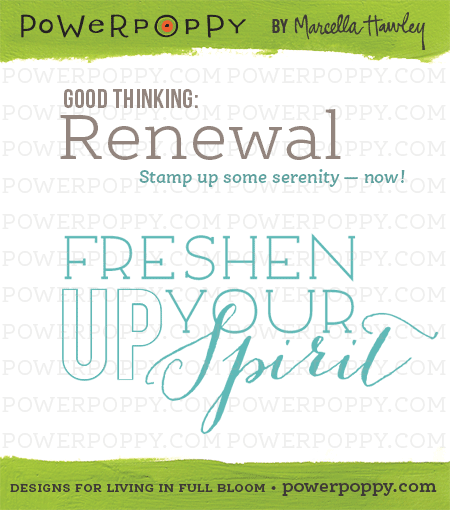
With on-trend typography designed by Marcella Hawley, Good Thinking: Renewal will end your search for "just the right" rejuvenating words! This all-sentiment set measures 4" by 6" and is loaded with 16 images. Take a deep breath in, exhale out and stamp up some serenity. Now doesn't that just feel better?

I've been playing with my Silhouette Cameo to create this card and combined a couple of files and modified a bit to create a tent card!  I've used the 3D Stand Up Card: Strawberry for the main part of the card, (although I added an extra red layer) and the 3D Poppy for the flower to use instead of the strawberry.....because I thought the poppy would be appropriate!!  ;-)  Once I constructed all this, I stamped the sentiment from Power Poppy's Good Thinking: Renewal set on the inside.  :)

This is the view from the side.....

Today the Bloom Brigade is stamping out some serenity and they'd love to share a bit with you! 
Allison Cope
Christine Okken
Cindy Lawrence
Danielle Kennedy
Dawn Burnworth
Kathy Jones (you are here!)
Katie Sims
Leslie Miller
Stacy Morgan
Tosha Leyendekker

Don't forget......TOMORROW is release day!!!  WOOHOO!!!!!  The team will have a hop full of eye candy for you and then you can finally hit the store and buy these gorgeous sets!!  :)

Thanks for visiting and hope you are inspired to stamp!!

Thursday, March 20, 2014

Wonderful Pansies!

Hello Everyone!!  Today I've been playing with this sweet basket of pansies from JustRite Papercraft!  Isn't it just darling!  :)  I've even used the matching EXACT cut SVG file so it pops off the page!

I've used a base of blue card and layered with vanilla.  Then I've taken another layer of vanilla and stamped this beautifully detailed Floral Lace Vintage Tags cling background stamp in Memento Peanut Brittle.  I've then added a piece of cream lace and blue ribbon down one side.  Next I've stamped the middle tag frame again in Memento Desert Sand and cut it out with the matching Vintage Tags Dies and popped it up on foam tape.  Next I used my Silhouette Cameo and the SVG Pansies in Spring digital download to cut the basket shape.  I've inked up the Pansies in Spring stamp, left it lying on the acrylic block and then placed the die cut over the top pressing firmly to transfer the ink.  I've then coloured it with Copics (B60, B63, B66, G40, G43, G46, E21, E23, E25, E27).  I've stamped the sentiment, made it into a notched tag and then glued the basket over the top.

Stamps - Pansies in Spring (JustRite)
Paper - X-press It Blending Card, Blue, Vanilla
Ink- Memento Peanut Brittle, Rich Cocoa, Tuxedo Black
Accessories - Copics, SVG Pansies in Spring, JustRite Vintage Tags Dies, Ivory Lace, Blue Ribbon, Foam Tape.

That's all from me for now, thanks for visiting and hope you are inspired to stamp!  :)

Sunday, March 9, 2014

Pansies in Spring


Hello Everyone!  Welcome to Day Four of the JustRite Papercraft March Release!  Today it's another gorgeous, elegant set called Pansies in Spring!

Of course this set, like all our sets this month, comes with a matching Pansies in Spring Digital SVG file.  It comes with an Exact and Offset file depending on whether you want a close cut or a white edge around your image.
http://justritepapercraft.com/collections/digital-cut-file-downloads/products/svg-pansies-in-spring-digital-cut-file-download

I've created my white card base using Romantic Rectangles and then layered with purple bazzill and more white cut with Spellbinders Fancy Lattice.  Around this I've attached white and purple ribbons.  I've cut a piece of white with JustRite's Vintage Labels Seven die, airbrushed the middle (while still in the die) with Copic V22.  I've stamped the sentiment from Pansies in Spring in Memento Tuxedo Black in the top corner.  I've used the Pansies in Spring SVG Cut File and my Silhouette (and Designer Edition Software) to cut the shape and then stamped the matching image onto it in Tuxedo Black.  I've then coloured it with Copics (V12, V15, V17, Y11, Y17, G21, G24, G28) and popped it up on foam tape.  To finish I've added a bow to the ribbon and a few pearls at the bottom of the sentiment.

Stamps - Pansies in Spring (JustRite)
Paper - X-press It Blending Card, White, Purple Bazzill
Ink - Memento Tuxedo Black
Accessories - Copics, JustRite Vintage Labels Seven Dies, JustRite Pansies In Spring SVG File, Spellbinders Romantic Rectangles, Fancy Lattice, White and Purple Ribbons, Bow Easy, White Pearls, Foam Tape, Glue.

Don't miss the absolutely gorgeous creations the team have for you today!


That's all from me today, thanks for visiting and hope you are inspired to stamp! :)

Friday, March 7, 2014

Owl Be Yours


Hello Everyone!  It's Day Two of the JustRite Papercraft March Release and the cuteness continues!!!  Yep, it's another super fun set and this one is all about OWLS.  Designed by Samantha Walker this one called Owl Be There!
http://justritepapercraft.com/products/owl-be-there

Like all our stamp sets this month, it comes with it's very own Digital Cut File!  This SVG file is compatible with many digital cutting machines such as the Silhouette.  The Silhouette does need the Designer Edition Software to open SVG files.  Check your machine's compatibility!  These files are only .99c!

I couldn't help but reach for the bright, happy colours again for this set!  I've used a base of pink and layered with white and some MME My Girl DP.  Across this I've added a piece of white embossed with Spellbinders MBossibilities Twisted Hearts and matted with pink and I've also added a couple of layers of punched scallop borders across the bottom in Pool Party and Pumpkin Pie.  I've used the Owl Be There Digital Cut SVG File and my Silhouette Cameo (and Designer Edition Software) to cut a tree trunk and owl shape (the offset version of the SVG file).  The cardstock I've used is the X-press It Blending Card on a Textured Cardstock setting.  It's very easy to use the Owl Be There clear stamps to line up and stamp the images on the offset cuts.  I've used Memento Tuxedo Black to stamp the images and then coloured with Copics.  I've then die cut a heart using Spellbinders Classic Hearts (and lightly airbrushed the middle with RV52) and 'hung' it over the branch with some pink baker's twine.  To finish I've stamped the sentiment in black and created an notched tag and popped it up on foam tape.

Stamps - Owl Be There (JustRite)
Paper - X-press It Blending Card, Pink, White, MME My Girl DP
Ink - Memento Tuxedo Black
Accessories - Copics, Owl Be There SVG (JustRite), Silhouette Cameo, Spellbinders Classic Heart die, Bakers Twine, Scallop Punch, X-press It Foam Tape.

Want to see some awesome birdie creations and check out our other release today (Cascading Ferns), check out what the team have for you today!


That's all from me today, thanks for visiting and hope you are inspired to stamp!!  :)

Tuesday, December 18, 2012

Ho Ho Ho!

Hello Everyone!!  Today's project is a giftbox that I made using my Silhouette Cameo!  Looooove this machine!  :)  I downloaded the template from the Silhouette Store and cut it out of red cardstock.  Next I found a Stampin' Up Wheel and added a light pattern all over and tied it up with a silver and green bow.  I covered the window opening (which in hindsight would have been better to take the window out BEFORE cutting) with a piece of pretty Christmas paper.  Next I made the tag!  I had this cute Santa image from Flourishes' Joy is in the Air stamp set just begging to be coloured with Copics!  After it was coloured, I've cut it out with Circle Nestabilities and matted it with some green cut with Lacey Circle Nestabilities.  I've then popped it up on a piece of red cut with Labels 18 Nestabilities and embossed it with Dainty Dots M-Bossibilities.  I've tied it to my pretty packaging with a piece of gold cord!

I used this packaging for the Secret Santa gift exchange at my work Christmas party!  :)

Stamps - Joy is in the Air (Flourishes)
Paper - X-press It Blending Card, Red, Green, Bo Bunny DP
Ink - Memento Tuxedo Black, Real Red Ink
Accessories - Copics, Silhouette Cameo, Template, Circle, Lacey Circle and Labels 18 Nestabilities, Silver and Green Ribbons, Gold Cord, Stampin Up Wheel.

That's all from me today, thanks for visiting and hope you are inspired to stamp!

LinkWithin

Related Posts with Thumbnails