Monday, January 22, 2018
It's Back To School Time
Hello Everyone! It's that time again - the very first day of the new school year here in Australia! My daughter is in Grade 5 this year and had to have a notebook for her classes ---- so we decided to decorate it a little bit so it won't get confused with anyone elses!! (I think we achieved the aim!) LOL!
For this project, we've taken a Spirax notebook, covered it with some green spotty paper from my stash and stuck it down with some X-press It High Tack Double Sided Tape. Then I've adhered some schoolish type paper also from my stash and put that in the middle. We've added a little shine with some Gold Foil Deco Tape top and bottom of the middle panel. Next I've taken some X-press It Adhesive Sheets, peeled off one side and stuck it to some Blending Card and die cut it with a Spellbinders Alphabet for the name. Then I peeled off the other side of the Adhesive sheet and covered the letters with Scarlet Microfine Glitter and glued the letters to the top of the notebook. Finally I die cut the Apple and A+ using ODBD's A+ Apples Dies.
I surprised Ally with a little extra decorating inside using Power Poppy's Small But Mighty Affirmations - I thought this sentiment was perfect!
Stamps - Small But Mighty Affirmations (Power Poppy)
Ink - Rhubarb Stalk, Dandelion
Paper - Random paper from my stash
Accessories - X-press It: Adhesive Sheets, Scarlet Microfine Glitter, Foil Deco Tape, High Take Double Sided Tape, 2in1 Glue, Clear Gel Glue, Blending Card; ODBD A+ Apples Dies, Spellbinders Alphabet Die
That's all from me today, thanks for visiting and hope you are inspired to stamp! :)
Friday, January 19, 2018
Grateful
Hello Everyone! Today we are having a peek back at the latest release by ODBD! I just love this stamp and die combo called Hello Friend with it's variety of useful sentiments for all occasions!! I also love this awesome Card Caddy and Gift Bag Die released last month and just can't stop using it! :)
I've used cream card to create the bag and handles using Card Caddy and Gift Bag Dies. I've then cut two rectangles using the pretty new Romantic Roses Paper Pad. I've then used Gift Bag Handles and Topper Dies to cut the solid paper to create the topper on the bag. I've stamped the flowers, buds, leaves and sentiment from Hello Friend onto X-press It Blending Card and coloured the images with Copics (RV000, RV91, RV93, RV95, Y21, G40, G43, G46). I've die cut these with the matching dies from Hello Friend and attached as shown. I've die cut the sentiment (which is two separate sentiments that match together) with Double Stitched Circles Dies and popped it up on foam tape.
Stamps - Hello Friend (ODBD)
Paper - ODBD Romantic Roses Paper Pad, Cream, X-press It Blending Card
Ink - Memento Tuxedo Black
Accessories - ODBD Dies: Hello Friend Stamp and Die Combo, Card Caddy and Gift Bag, Gift Bag Handles and Topper, Double Stitched Circles; X-press It Foam Tape and High Tack Double Sided Tape
The Breadsticks have some gorgeous projects to show you today - you can find all the links on the
That's all from me today, thanks for visiting and hope you are inspired to stamp! :)
Monday, January 1, 2018
ODBD January Release
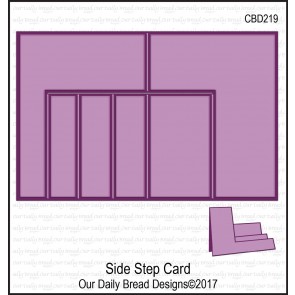
Hello Everyone! Welcome to a brand new year! We are kicking off 2018 with a new release by Our Daily Bread Designs and today I'm playing with a new stamp and die combo set called Hello Friend and combining that with the Side Step Card Die and the co-coordinating Side Step Layers Dies plus Double Stitched Circles and Fence Dies. Also we have this beautiful paper collection called Romantic Roses that is available now!
I've used a base of Sweet Sugarplum cut with Side Step Card Die and layered with pieces of Romantic Roses paper cut with Side Step Layers with makes decorating a snap! I've used ODBD's Fence die to cut a piece of white card and glued it across the bottom. Next I stamped and cut a variety of peonies, buds and leaves from Hello Friend in Memento Tuxedo Black onto X-press It Blending Card and coloured with Copics (RV000, RV81, RV83, RV85, RV91, G40, G43, G46) and affixed them as shown. Finally I've stamped the sentiment from Hello Friend in black, die cut with Double Stitched Circles and attached as shown.
Stamps - Hello Friend (ODBD)
Paper - ODBD Romantic Roses Paper Pad, Sweet Sugarplum, White, X-press It Blending Card
Ink - Memento Tuxedo Black
Accessories - ODBD Dies: Side Step Card, Side Step Layers, Double Stitched Circles, Hello Friend stamp and die combo, Fence; Copics, X-press It Foam Tape
The Breadsticks have some gorgeous creations with the release today, so make sure you pop by and visit!
That's all from me today, thanks for visiting, Happy New Year and hope you are inspired to stamp! :)
Subscribe to:
Posts (Atom)


