Friday, December 22, 2017
Christmas Wishes
Hello Everyone!! The Power Poppy Bloom Brigade are having a hop to celebrate the season and share a little joy!! You'll find each blog showcasing one of their favourite festive cards or projects, just as you are settling in around your Christmas Tree, singing carols or in Australia, under a fan, in an airconditioned room or getting out of the pool! Yep, Summer is here for sure with the heat and humidity as many prepare for a typical Christmas feast of seafood and pavlova! :) Whatever the weather in your part of the world, I hope you hop with us and share the joy of the season!
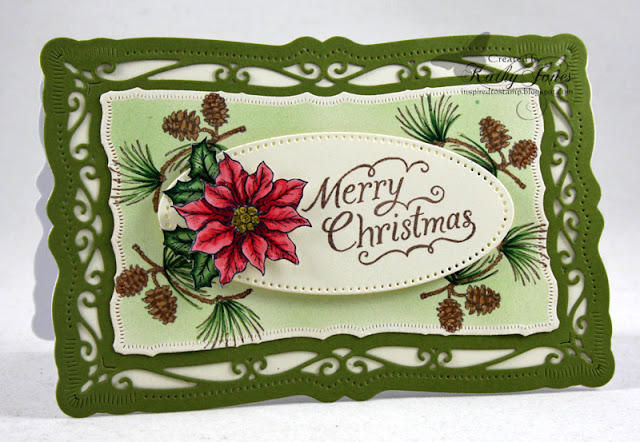
I'm showing you a few that actually haven't been on my blog as they were featured in Simply Cards Magazine last year and couldn't be shown on my blog during the festive season - but can be now!
For these cards I've used these Power Poppy stamps..... Poinsettia, Merry Littles and Heaven and Nature Sing.
The Bloomies have an array of gorgeousness just waiting for you, so tuck in and enjoy!!
Merry Christmas everyone! I hope you all are blessed with a harmonious and happy Christmas filled with love, happiness and precious memories!
Friday, December 15, 2017
Christmas Bag and Card
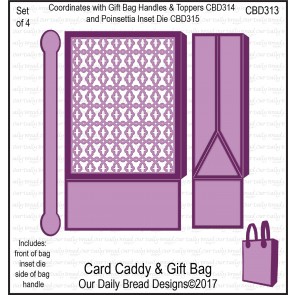
Hello Everyone! Today I'm playing with some of the latest releases by ODBD - making a couple of Christmas projects! My first one is a giftbag - using the Card Caddy and Gift Bag Die to cut some cream card to make the base of the bag. I've then used the Gift Bag Handles and Topper Dies to cut a piece of ODBD Christmas 2017 paper for the top. Once I've glued that to the cream base, I've used another die from Gift Bag Handles and Topper dies to cut the rectangular handle. I've also used a piece of ODBD Christmas 2017 paper for the green panel behind the cream filigree front panel. I've created the poinsettias using Peaceful Poinsettias dies as well as Leaves and Branches dies. The brown card curve was cut using Curvy Slopes dies. Finally the lovely Merry Christmas sentiment was cut using gold card and the Merry Christmas Caps die! Perfect for giving a little Christmas gift or a set of cards!
Stamps - None
Paper - Cream, Brown, Red, Green, ODBD Christmas 2017 Paper Pad
Ink - None
Accessories - ODBD Dies: Card Caddy & Gift Bag, Gift Bag Handles and Topper, Peaceful Poinsettias, Leaves and Branches, Curvy Slopes, Merry Christmas Caps, X-press It High Tack Tape
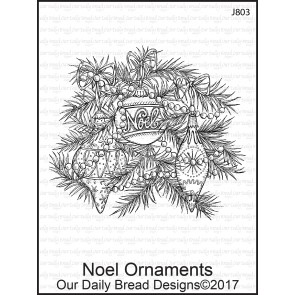
My second project today is a card full of festive cheer! This one has a base of white, a panel of blue cut with Snowflake Sky die. I've then used another die from the same set to cut the white topper panel of snowflakes. Next I've take a piece of Christmas 2017 Collection Paper and created a notched tag piece. I've stamped the Noel Ornaments image in Memento Rich Cocoa onto X-press It Blending Card and coloured with Copics. I've cut this out with Pierced Circles Dies and popped up on foam tape. To finish I've added a few silver sequins for a touch of sparkle!
Stamps - Noel Ornaments (ODBD)
Paper - ODBD Christmas 2017 Collection Paper, White, Blue, X-press It Blending Card
Ink - Memento Rich Cocoa
Accessories - ODBD Dies: Snowflake Sky, Pierced Circles; Copic Markers, X-press It Foam Tape, Silver Sequins
Want to see what the Bread Basket have been creating with this month's release?? Check out these blogs....
That's all from me today, thanks for visiting and hope you are inspired to stamp! :)
Sunday, December 10, 2017
Christmas Cracker
Hello Everyone!! I'm on the Power Poppy Blog making a Christmas Cracker for the 12 Days of Christmas December Challenge! If you play along making a cracker, place card or any of the amazing projects the Bloom Brigade have been creating to inspire you with, you will have the chance to WIN a $50 Shopping Spree at Power Poppy!!
I've made a Christmas Cracker (or Christmas Bon Bon as we know them here in Australia) and a matching place card using Under Glass: Christmas Traditions, that you can read all about over at the Power Poppy Blog!
For all the deets on these projects plus so many others by the incredible Bloom Brigade go to the Power Poppy Blog!! If you want to play along with the 12 Days of Christmas Challenge you can find all the details and linky HERE!!
Thanks for visiting and hope you are inspired to stamp! :)
Friday, December 1, 2017
ODBD December Release!
Hello Everyone! Can you believe it is the first of December?! That means it's time for a brand new release by Our Daily Bread Designs!! I nearly fell off my chair when I saw this one - can you believe this totally adorable Card Caddy/Gift Bag??!! I absolutely LOVE it and know this is one die I'm going to use ALLLLLLL the time for all sorts of occasions, imagine the possibilities!!
Of course it wouldn't be a new release without PRIZES to WIN!!
Three randomly selected winners will each receive a $25 Gift Code to the ODBD Website just for commenting on the Design Team cards! You
have until December 2, 2017 at 9:00 p.m. EST to leave your comments on
the Designers Blogs for a chance to win! The Winners will be posted on
the ODBD Blog on December 3rd so be sure to check back there to see if
you won!
Here are the products I've used for both of my samples today!
The first bag I've made all the base from cream card using the Card Caddy & Gift Bag Die and attached with high tack tape. Next I've cut a piece of Christmas 2017 paper with Snowflake Sky, topped with brown card and topped again with more Christmas 2017 paper. I've then used the Merry Christmas Caps die to cut a piece of glitter card and attached it to the middle of the bag.
Stamps - None
Paper - Christmas 2017 Paper Collection, Cream, Brown, Gold Glitter Card
Ink - None
Accessories - Card Caddy and Gift Bag, Snowflake Sky, Merry Christmas Caps
For my second sample, I've cut the bag out of red card using the Card Caddy & Gift Bag and then used the Christmas 2017 Paper Collection and the Gift Bag Handles and Topper to create the top and bottom accent pieces. The handles have been cut out of green and attached as shown. I've stamped Noel Ornaments in black into onto X-press It Blending Card and coloured with Copics. I've also added some Spica for sparkle to the image. I've cut this out with Double Stitched Circles and also added gold Spica to the edge of the die cut and then attached as shown.
Stamps - Noel Ornaments (ODBD)
Paper - ODBD: Christmas 2017 Paper Collection, Red, X-press It Blending Card, Green
Ink - Memento Tuxedo Black
Accessories - ODBD Dies: Card Caddy and Gift Bag, Gift Bag Handles and Topper, Double Stitched Circles
The Bread Basket have some incredible samples that you will definitely want to see today, so make sure you visit these blogs....
Monday, November 27, 2017
Graduation
Hello Everyone! Here in Australia, we are coming to the end of our school year and our Year 12 students have all just finished their schooling and preparing for University or the work force. I have been working with a young woman since April who although was in the middle of her Year 12 studies and being home schooled; took the big step of also starting a Pastry Chef apprenticeship full time as well. She really is such a lovely young woman and has been a great addition to the team - so when she finally completed her final exams and graduated, I wanted to make her a card to celebrate the occasion!
I've created a base of white using Radiant Rectangles and topped with pink using the same die. Then I've cut some silver using the next die in the set. I've stamped the image from As You Graduate in Memento Tuxedo Black onto X-press It Blending Card and coloured with Copics and sponged the sky with different inks. I've cut this out with the oval from Radiant Rectangles and matted with pink cut with another die from the same set. I've used the sentiment from For The Graduate and split it up, stamping one part and die cutting with Labels 33 and the stamping the other part and cut with Ribbon Banners Dies. To finish I've added a couple of clear rhinestones.
Stamps - As You Graduate, For the
Paper - White, Pink, Silver, X-press It Blending Card
Ink - Memento Tuxedo Black, Dandelion, Angel Pink, Summer Sky
Accessories - Copics, Spellbinders: Radiant Rectangles, Ribbon Banners, Labels 33; Clear Rhinestones
That's all from me today, thanks for visiting and hope you are inspired to stamp! :)
Friday, November 17, 2017
Christmas Cardinal
Hello Everyone! Today I'm playing with the latest November releases from Our Daily Bread Designs and getting ahead on my Christmas card stash!! The new toys.....I mean release products that I'm playing with today are this lovely cardinal and sentiment stamp set called Winter Cardinal and this fabby Snow Globe die!
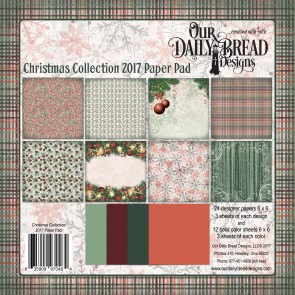
To create this card, I've used a base of Chocolate Chip topped with a solid green paper from Christmas Collection 2017. On top of that is a patterned piece of paper from the same collection that has been die cut with the largest die from Snowflake Sky. Around this I've attached a large red hessian ribbon. Next I've die cut a piece of silver card using the Snow Globe die. The Cardinal and sentiment from Winter Cardinal have been stamped in Memento Tuxedo Black onto X-press It Blending Card and coloured with Copic markers. The cardinal has been die cut with the Snow Globe die and the sentiment with Layered Lacey Ovals. I've used foam tape to it up. Finally I've die cut some white card using Snow Crystals dies, attached them as shown and added a clear rhinestone to each.
Stamps - Winter Cardinal (ODBD)
Ink - Memento Tuxedo Black
Paper - Christmas Collection 2017, Chocolate Chip, X-press It Blending Card, Silver
Accessories - ODBD Dies: Snow Globe, Layered Lacey Ovals, Snow Crystals, Snowflake Sky; Copics, Red Hessian Ribbon, Clear Rhinestones, X-press It Foam Tape
Want more inspiration?? Pop on by these blogs.....
That's all from me today, thanks for visiting and hope you are inspired to stamp! :)
Wednesday, November 1, 2017
Cardinal Blessings
Hello Everyone! It's time for a brand new Christmas Release by ODBD!! Not only are there some beautiful stamps, but also some fabulous dies and paper available as well!! Today I'm using Winter Cardinal, Snow Globe Die and Christmas Collection 2017 Paper Pad!! Want these for yourself? Well you have the chance to win your very own!
Prize Information:
Three randomly selected winners will each receive a $25 Gift Code to the ODBD Website just for commenting on the Design Team cards! You
have until November 2, 2017 at 9:00 p.m. USA EDT to leave your comments on
the Designers Blogs for a chance to win! The Winners will be posted on
the ODBD Blog on November 3rd so be sure to check back there to see if
you won!
I've used a red base and topped with some golden brown card and some Christmas Collection 2017 Paper. Across this I've added a strip of red topped with more Christmas Collection 2017 Paper and wrapped some white ribbon around the layers. I've stamped the Winter Cardinal onto X-press It Blending Card and coloured with Copics. I've then cut the snow globe using Snow Globe Die, out of the brown card and placed the Cardinal image behind it and popped it all up on foam tape. I've stamped the sentiment also from Winter Cardinal in black ink and die cut it with Stitched Ovals Die and also popped this up. To finish I've added a bow to the ribbon.
Stamps - Winter Cardinal (ODBD)
Ink - Memento Tuxedo Black
Paper - ODBD Christmas Collection 2017 Paper Pad, X-press It Blending Card, Red, Brown
Accessories - ODBD Dies: Snow Globe, Stitched Ovals; Copics, X-press It Foam Tape
Don't miss all the beautiful creations the Bread Basket have for you today!
Tuesday, October 24, 2017
Power Poppy Release Day Hop!
Hello Everyone!!! It's finally here - Power Poppy Release Day!! If you've been following the Power Poppy Blog and the Bloom Brigade over the last week you will have been inspired by an amazing new collection of Holiday Stamp Sets and they are all available RIGHT NOW!! WOOHOOO!!!
I have used the brand new Under Glass Christmas Traditions for today's hop - I just love the versatility of being able to use the images on their own or with the coordinating cloche! I've chosen this gorgeous stack of presents and gone with an nontraditional colour palette of purples and blues. I've used a purple base and topped with white and some DP from my stash. I've used a strip of matching paper down the side. Next I've stamped the image from Under Glass Christmas Traditions in Memento Tuxedo Black and coloured with Copics. I've cut this to size, matted with some teal card and the matted again with purple card cut with the Branching Out Die. Across this I've added two pieces of silver cord. I've then stamped the sentiment from Under Glass Christmas Traditions in black and die cut with Pierced Circles and popped it up on foam tape. To finish I've added a couple of buttons.
Stamps - Under Glass Christmas Traditions (Power Poppy)
Ink - Memento Tuxedo Black
Paper - X-press It Blending Card, Purple, Teal, White, Kaisercraft DP
Accessories - Copics, Spellbinders Branching Out Die, ODBD Pierced Circles Die, Silver Cord, Buttons, X-press It Foam Tape
Don't miss all the amazing creations the Bloomies have for you today!!
That's all from me today, thanks for popping by and hope you enjoy the hop and are inspired to stamp! :)
Saturday, October 21, 2017
Glitter House Village
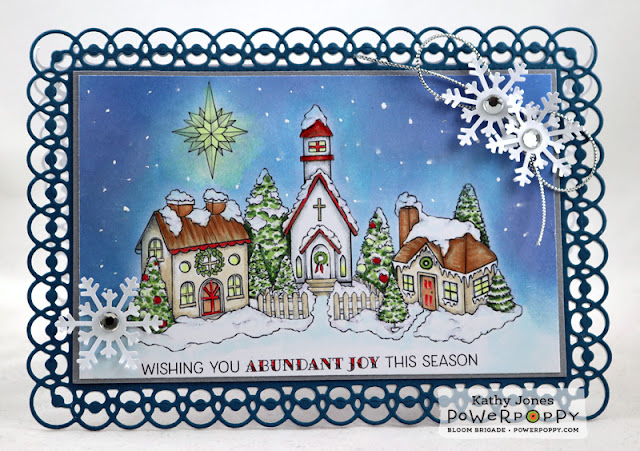
Hello Everyone! Today Power Poppy have another new set for us to sneak peek!! Today we have Glitter House Village - isn't it beautiful!!! I was thinking of my mother as I made this card - she always loved images of rows of houses or shops!
I've stamped the house image, star and sentiment from Glitter House Village in Memento Tuxedo Black onto X-press It Blending Card and coloured with Copics. I've then mostly sponged the sky with blue and purple inks and then added dots of Copic Opaque White to the sky for snow or stars. I've never really done dark skies before, I can't say I'm particularly good at it yet - might need a little more practice! I've cut this to size, matted with silver card and then matted again with dark blue card cut with 5x7 Detailed Scallops Die. I've used the same die to cut a base of white and glue to the back to create the card base. Next I've added some silver cord and rhinestone centered punched snowflakes to accent.
Stamps - Glitter House Village (Power Poppy)
Ink - Memento Tuxedo Black
Paper - X-press It Blending Card, Silver, Blue, White
Accessories - Copics, Copic Opaque White, Spellbinders 5x7 Detailed Scallops, MS Snowflake Punch, Silver Cord, Clear Rhinestones
Don't miss more inspiration using this fabulous new set by popping by these blogs!!
That's all from me today, thanks for visiting and hope you are inspired to stamp! :)
Friday, October 20, 2017
Autumn Sunflower
Hello Everyone! Today the ODBD girls are having a look back at the October Release and I have this beautiful sunflower image from Be A Sunflower and a couple of fabby dies to show you!
I've used a base of Chocolate Chip and layered with some paper from Follow the Son Paper Pad. I've then made a layer of patterned paper from Follow the Son Paper Pad and cream card cut with Lattice Background Die. Once of I've glued then last two layers together, I've used the Rounded Rectangles die to cut a hole in the middle and then popped up the remaining frame piece on foam tape. I've then stamped the sunflower from Be A Sunflower in Memento Tuxedo Black onto X-press It Blending Card and coloured with Copics. I've die cut this with Rounded Rectangles and sponged the edges while still in the die. I've used some Hessian Ribbon (Burlap to my American friends) across the bottom corner. I've stamped the sentiment from the same stamp set in black, die cut with Pennant Flags, sponged while in the die and attached to the ribbon. To finish I've accented with leaves cut using the Follow the Son Paper Pad and the newly release Stitched Leaves Dies.
Stamps - Be A Sunflower (ODBD)
Ink - Memento Tuxedo Black, Antique Linen
Paper - ODBD Follow the Son Paper Pad, Chocolate Chip, Cream, X-press It Blending Card
Accessories - ODBD Dies: Stitched Leaves, Rounded Rectangles, Pennant Flags, Lattice Background, Copics, Hessian Ribbon, X-press It Foam Tape
I'm sure you are looking forward to seeing some more inspiration from the Bread Basket, so pop by these blogs and have a peek!
Thanks for popping by and hop you are inspired to stamp! :)
Tuesday, October 17, 2017
Rustic Rejoicing
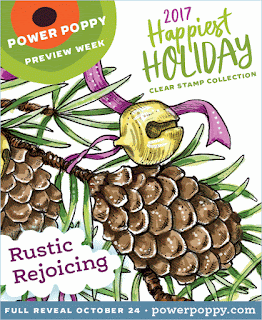
Hello Everyone! It's Day 2 of the brand new Power Poppy Happiest Holidays 2017 Release!! Today we have for you......Rustic Rejoicing!! For something less snowy and more woodsy - this set is full of natural beauty!
I've used a base of red topped with cream and brown cut with Divine Eloquence. Around these layers I've attached some cream ribbon. Next I've stamped the bough of pine cones from Rustic Rejoicing in Rich Cocoa and coloured with Copics. I've cut this out with Labels 28 Dies and adhered to the front of the card. I've stamped the sentiment in black, die cut with Large Circles and sponged with Antique Linen ink while in the die and popped up on foam tape. To finish I've added a bow.
Stamps - Rustic Rejoicing (Power Poppy)
Ink - Memento Tuxedo Black, Rich Cocoa, Antique Linen
Paper - X-press It Blending Card, Brown, Cream, Cherry Cobbler
Accessories - Copics, Spellbinders Large Circles, Labels 28 and Divine Eloquence, Cream Ribbon, Bow Easy, X-press It Foam Tape
There are more samples using this beautiful set, so make sure you pop by and see what the Bloomies have for you today!
That's all from me today, thanks for visiting and hope you are inspired to stamp! :)
Friday, October 6, 2017
October Power and Spark!
Hello Everyone! It's the first Friday of the month and that means it's time for another Power Poppy Power and Spark Challenge!! This month our lovely hostess is Stacy and she's challenged us to make a mini card!! Of course it wouldn't be a Power and Spark Challenge without the chance to win a $50 Shopping Spree!!! What are you waiting for - time to create, mini style!!
I've used Under Glass for my image and sentiment today, coloured with Copics and matted with layers of diecuts of white overlaid on a layer of pink. Add some pink and white ribbons, a bow and some sequins and Voila! you're done!!
Stamps - Under Glass (Power Poppy)
Ink - Memento Tuxedo Black
Paper - X-press It Blending Card, White, Pink
Accessories - Copics, Spellbinders Adorning Squares, ODBD Pierced Circles and Pennant Flags, Pink and White Ribbons, Bow Easy, X-press It Foam Tape, Sequins
Check out what the Bloom Brigade have been creating this week!!
That's all from me today, hope you play along with us this month and that you are inspired to stamp! :)
Sunday, October 1, 2017
You are My Sunshine
Hello Everyone! It's the first of the month and that means it's time for a brand new release by Our Daily Bread Designs!! Whether it's Autumn or Christmas themes, we've got you covered this month - just in time to get your holiday projects underway!
Of course it wouldn't be a release without PRIZES and we have three to give away this month! All the deets are below!
Three randomly selected winners will each receive a $25 Gift Code to the ODBD Website just for commenting on the Design Team cards! You
have until October 2, 2017 at 9:00 p.m. USA EDT to leave your comments on
the Designers Blogs for a chance to win! The Winners will be posted on
the ODBD Blog on October 3rd so be sure to check back there to see if
you won!
I've created my card base using the brand new Rounded Rectangles Dies - I think these are awesome and such a great size to create card bases, but with a variety of sizes these will be super useful! I've die cut a piece of cream card while it was folded and then placed aside. I've used the exact same size to cut a piece of So Saffron card and topped with paper from the Follow the Son Paper Pad cut with Double Stitched Rounded Rectangles Dies. Next I've used the Stitched Leaves Dies and cut many leaves using the solid coloured papers from the Follow the Son Paper Pad and arranged them as shown - gluing them into place. I've then cut some deep yellow paper from Follow the Son using Stitched Oval Dies and attached as shown and then adhered some hessian (burlap) ribbon around all the layers. I've then stamped the sentiment from Be a Sunflower in black ink directly onto the oval. Stamp the image from Be A Sunflower in Memento Rich Cocoa onto X-press It Blending Card and colour with Copics. Now - this Sunflower image does have a matching DIE; Sunflower Die; but mine is still finding it's way across the Pacific Ocean, so I've fussy cut mine to get the same look.........the die will be WAY quicker and easier! I've popped this up on foam tape to the side and balanced with an extra leave on the other. To finish I've added a couple of enamel dots.
Stamps - Be A Sunflower (ODBD)
Paper - Followe the Son Paper Collection, So Saffron, Cream, X-press It Blending Card
Ink - Memento Rich Cocoa, Versafine Black
Accessories - ODBD Dies: Round Rectangles, Double Stitched Rounded Rectangles, Stitched Leaves, Stitched Ovals; Enamel Dots, Hessian Ribbon, X-press It Foam Tape, Scissors, Glue
You won't want to miss all the fabby projects the team have created this month, so make sure you pop by and have a look (and don't forget to comment for your chance to win!).
That's all from me today, thanks for popping by - don't forget to comment for your chance to win - and hope you are inspired to stamp! :)
Friday, September 29, 2017
Feeling Under the Weather
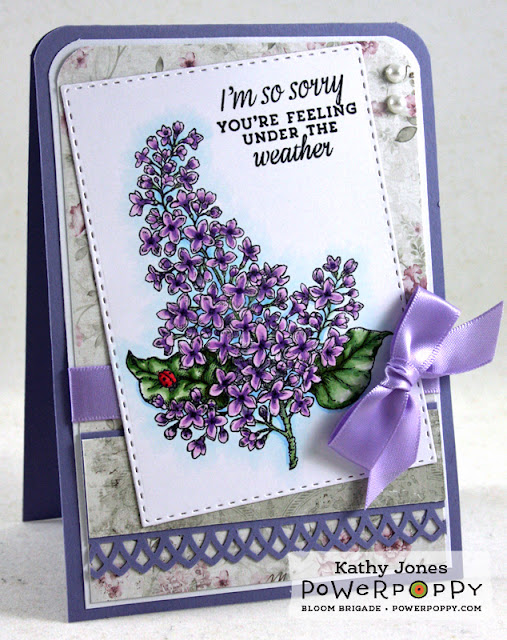
Hello Everyone! It's time for Good Vibe 5 over at Power Poppy with 5 things to inspire you today!! What better time to send a little cheer and good vibes when someone you care about is a little under the weather! I don't know about your part of the world, but in mine our state (and the one next to us) has been in a huge influenza epidemic. I thank God that it did not hit our house, but our poor hospital staff are severely overworked right now. Whether it's the flu or something else that's hit someone you know, a get well card is always going to make them feel like a little love it coming their way!
For this card, I've used a base of Wisteria Wonder, layered with white and topped with some Maja Designs DP. Across this is more Wisteria punched with a border punch and topped with more DP. Around this I've added some purple ribbon. The floral image is from Lilac Time and the sentiment from Daffodils stamp set. I've stamped these in Memento Tuxedo Black on X-press It Blending Card and coloured with Copics and then die cut with Double Stitched Rectangles Dies and attached as shown. To finish I've added a couple of pearls to the corner and a bow to the ribbon.
Stamps - Lilac Time, Daffodils (Power Poppy)
Paper - X-press It Blending Card, Wisteria Wonder, White, Maja Designs Walk With Me DP
Ink - Memento Tuxedo Black
Accessories - Copics, ODBD Double Stitched Rectangles Dies, MS Border Punch, Purple Ribbon, Bow Easy, Pearls
Want more inspiration?? Check out the Bloomies and see what they have for you today!
That's all from me today - thanks for popping by and hope you are inspired to stamp! :)
Monday, September 25, 2017
Hibiscus Box
Hello Everyone!! It's Springtime here in Australia, which means it's really Summer! LOL!! We really only have hot and cool where I live (and a few cold days - but that's cold to us, not like those of your who live in Canada or the like) - so although it is September and technically early Spring, the temps are into the mid-30C's (or mid 90's) which I admit is quite above normal for this time of year. So I am getting into Spring/Summer themed projects!! I had a colleague have a birthday recently and she's not really a pink/girly type, so I when for a tropical theme box for her - which I filled with some Darrell Lea Peanut Butter Chocolate Balls! :)
This box really didn't take that long and I was really happy with the way it turned out. I've used some teal coloured card and die cut it with the Glorious Gable Box Die by ODBD. I've put this together using some double sided tape and dots of glue to make it secure (don't want those Peanut Butter Balls going everywhere now do we!). I've made the flower using the Hibiscus Dies and some yellow card - airbrushing some YR18 Copic while still in the die and then all over the stamen as well. I've then shaped the petals and glued it together. The leaves have been made out of green card and die cut with Tropical Leaves Dies and once again airbrushed with Copic - this time G28. I've glued these and the hibiscus to the box as shown. Then sentiment is from Lovely Flower stamp set and has been stamped and cut into a notched tag and attached as shown. These small sentiments are just perfect for little tags to adorn the boxes!
Stamps - Lovely Flower (ODBD)
Paper - Teal, White, Yellow, Green
Ink - Memento Tuxedo Black
Accessories - ODBD Dies: Glorious Gable Box Die, Hibiscus Dies, Tropical Leaves Dies, Copics, Airbrush System, Glue
That's all from me today, thanks for popping by, hope the weather is nice in your part of the world....and that you are inspired to stamp!! :)
Friday, September 22, 2017
Marcy’s Tying the Knot Hop!
Hello Everyone! Today is an EXTRA SPECIAL HOP for our beloved Peep in Chief!!! Tomorrow our dear Marcy is marrying the love of her life, Doug, and to celebrate the Bloom Brigade and Instant Gardeners are having a Wedding Hop!! If you'd love to leave Marcy and Doug a special message, please leave that on the Power Poppy Blog - I know they will read each and every one of them!
Dearest Marcy and Doug - as your big day fast approaches, I just wanted to say how over the moon happy I am for you both! You are obviously head over heels for each other and I just know that you are going to be so very happy together! How many people can say that they have truly found their soul mate as you two have and are obviously so perfect together. As much as I know that your wedding will be stunningly gorgeous, it's more that I wish for you a truly happy, long and blissful marriage - the kind that your beautiful blended family will grow up and aspire for themselves. May you always have this joy, love and happiness that you do today. With much love from across the Pacific........Kathy xx
About my card - well I know that blue is traditional for weddings - but when has Marcy ever been traditional???? I could only ever imagine her wedding surrounded in GREEN - lots of plants, flowers and foliage! So I based my card on creams and greens with a splash of peachy/red. With a base of cream, then green and then more cream (cut with 5x7 Elegant Labels 4 and airbrushed with a little green inside). Then some green and peachy/red Graphic 45 DP cut with Grand Labels 4, topped with Wild Wasabi cut with more Elegant Labels 4. Across this is some wide ivory ribbon. Next is cream cut with Labels 4, topped with green cut with another Elegant Labels 4. Finally on top of this behemoth of a card is a oval of X-press It Blending Card, with the cake from Dream Wedding stamped in Grey Flannel. I've coloured this with Copics and sponged the edges with Antique Linen ink. I've popped these layers up on X-press It Foam Tape. I've stamped the sentiment also from Dream Wedding in Grey Flannel on cream card and die cut. I've added a huge bow and finished with a sprinkling of rhinestones.
Unfortunately due to the sheer amount of time international mail takes, this card won't quite make it in time for the wedding, but the heartfelt love will be with you on the day!
Stamps - Dream Wedding (Power Poppy)
Ink - Memento Grey Flannel
Paper - X-press It Blending Card, Cream, Wild Wasabi, Graphic 45 DP
Accessories - Copics, Airbrush System, Spellbinders Dies: Large Oval, Labels 4, 5x7 Elegant Labels 4, Grand Labels 4, Fancy Tags, Ivory Ribbon, Bow Easy, Clear Rhinestones, X-press It Foam Tape
If you started here, well you won't want to miss the start of the hop! If you are in the middle of the hop then continue on to your next gorgeous creation for our dear Marc!
Allison Cope
Christine Okken
Cindy Lawrence
Julie Koerber
Kathy Jones
Katie Sims
Stacy Morgan
Tosha Leyendekker
Christine Okken
Cindy Lawrence
Julie Koerber
Kathy Jones
Katie Sims
Stacy Morgan
Tosha Leyendekker
Thanks for stopping by, hope you love the hop and are inspired to stamp, or to get married, or attend a wedding.........or just love life!! xx
Monday, September 18, 2017
Here for You!
Hello Everyone! Today I have bright and Springy card to show you! I'm so happy that Spring has finally sprung here in Australia - I always feel like I finally start waking up when the weather starts warming in September --- I know, I really can't complain about Winter here in sunny Queensland, but Winter is still Winter and I'm always happy to see it pass! :)
This card features the beautiful Daffodils stamp set by Power Poppy and I've coloured it with Copics! The sentiment is also from Daffodils and I've used a variety of dies to showcase both. A simple card base, a touch of lace and ribbon and voila you're done!
Stamps - Daffodils (Power Poppy)
Ink - Memento Tuxedo Black
Paper - X-press It Blending Card, White, Daffodil Delight, DP
Accessories - Copics, Spellbinders Dies, ODBD Stitched Ovals Dies, Lace, Ribbon, X-press It Foam Tape
That's all from me today, thanks for popping by and hope you are inspired to stamp!
Tuesday, September 12, 2017
Joyful Nest
Hello Everyone! Today I was playing with my Copics and one of Power Poppy's latest release sets called Under Glass. Instead of popping this pretty nest image under the glass cloche that comes with the set, I decided to let this beauty shine on its own.
I've created the base using a base of brown and topped with some Pool Party card and the very pretty Maja Designs DP. Across this is some Pool Party punched with the lattice border punch and topped with brown and some gingham DP. Around this I've added some wide white ribbon and topped with some lavender ribbon. I've stamped the image from Under Glass in Memento Tuxedo Black onto X-press It Blending Card and coloured with Copics. I've then cut it out with Double Stitched Circles Dies and matted with brown cut with Royal Circles and then popped up on foam tape. The sentiment is also from Under Glass and has been stamped and cut into a notched tag. I've secured this to the card front with a glue dot and topped with a lavender bow. To finish I've added a couple of white pearls to the corner.
Stamps - Under Glass (Power Poppy)
Paper - X-press It Blending Card, Pool Party, Baked Brown Sugar, Maja Designs DP
Ink - Memento Tuxedo Black
Accessories - Copics, ODBD Double Stitched Circles Dies, Spellbinders Royal Circles Dies, MS Lattice Border Punch, White Pearls, Ribbons, Bow Easy, X-press It Foam Tape
That's all from me today, thanks for popping by and hope you are inspired to stamp. :)
Thursday, September 7, 2017
Birthday Clematis
Hello Everyone! It has been quite some time since I posted but I haven't been doing completely nothing. I have done a 6 card feature for Simply Cards and that's going to be on shelves in November! I have also been very busy with my family with various events and sports and such. So today I'm posting a card that was actually featured in Simply Cards 6 months ago. I really loved this card and it featured on the cover
This beautiful image is from Power Poppy called Climbing Clematis. It's a digi image which is great for resizing so that it fits your dies.....or alternatively fills the entire card depending on what you want to do with it! Of course I've coloured it all with my lovely Copic Markers. The sentiment is also a digi, from Tulips in Hobnail Pitcher. The card construction is pretty easy when you have some pretty dies.
Stamps - Climbing Clematis, Tulips in Hobnail Pitcher (Power Poppy)
Ink - Printer
Paper - X-press It Blending Card, White, Wisteria Wonder, DP
Accessories - Copics, Spellbinders Dies, Ribbon, ODBD Stitched Ovals Dies, X-press It Foam Tape
Last year we lost my loved Grandfather (Fella) and today marks what would have been his 99th Birthday. And although he is no longer with us, he is always remembered with a great deal of love.
I hope to be more creative and find that mojo again, thanks for stopping by and hope you are inspired to stamp! :)
Tuesday, August 1, 2017
Basketball Fever!
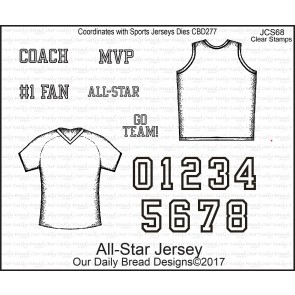
Hello Everyone!! Grab your bats, get ready to tee off, jump, spike and run.....we've got sports fever at Our Daily Bread Designs this month and we are cheering! Whether you are into Golf, Soccer, Football, Baseball, Softball, Volleyball or Basketball, we've got you covered! Today I'm showcasing two stamp sets and an extra die - Basketball (that comes with a matching die included in the set!), All- Star Jersey clear set and the fabulous matching die set, Sport Jerseys Dies.
It's new release time and that means there are prizes to be won!
Prize Information:
Three randomly selected winners will each receive a $25 Gift Code to the ODBD Website just for commenting on the Design Team cards! You
have until August 2, 2017 at 9:00 p.m. EDT to leave your comments on
the Designers Blogs for a chance to win! The Winners will be posted on
the ODBD Blog on August 3rd so be sure to check back there to see if you
won!
I chose Basketball this month because that's what sport my 10yr old daughter plays! Unlike her very undersized mother, she's the tallest girl in her team.....she obviously didn't get her height from me! :)
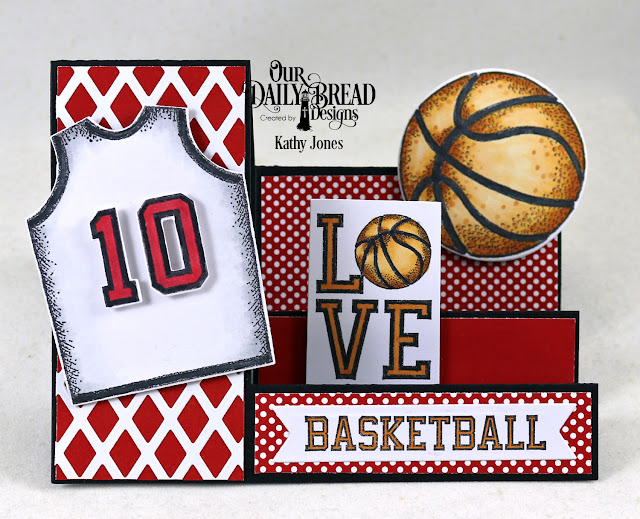
For my first card I've created a fun side step card using ODBD's Side Step Card Die to cut a piece of black card. For the solid and spotted red panels I've used some Old Glory Paper Pad. The lattice panel is created by cutting some white card using the Lattice Background Die and trimming it to size. Next I stamped the basketball singlet and numbers from All-Star Jersey and the basketball and sentiments from the Basketball stamp set in Memento Tuxedo Black onto X-press It Blending Card and coloured with Copics. The basketball has been die cut with the included die in Basketball set and the jersey and numbers die cut using the matching die in the Sport Jerseys Die Set. The 'Love' sentiment has simply been trimmed to size and the word 'Basketball' cut with Pennant Flags Dies. I've then either glued or popped up on foam tape the various elements as shown.
Stamps - Basketball, All-Star Jersey (ODBD)
Paper - ODBD Old Glory Paper Pad X-press It Blending Card, Black
Ink - Memento Tuxedo Black
Accessories - ODBD Dies: Sport Jerseys, Side Step Card, Lattice Background, Pennant Flags, Copics, X-press It Foam Tape
So why stop at one card when you can make TWO!
I've used a brown card base and layered with some solid red paper from Old Glory Paper Pad. Around this I've attached two pieces of wide black ribbon. Then I've used Double Stitched Rectangles for the backboard. I've created the ring out of brown card and die cut it with two Stitched Ovals dies. I've then taken the scrap of white cut with Lattice Background die from the previous card and trimmed it to a net shape. I've then stamped the basketball from the Basketball Stamp and Die set in Memento Tuxedo Black onto X-press It Blending Card and coloured it with Copics and die cut it with the matching die also in the Basketball set. Once I had the basketball, ring and net pieces I've put it all into place on the backboard and then drew in the black square with a black Copic Multiliner. To finish I've stamped the sentiment from Basketball stamp and die set and cut into a notched flag.
Stamps - Basketball (ODBD)
Paper - ODBD Old Glory Paper Pad, Brown, X-press It Blending Card
Ink - Memento Tuxedo Black
Accessories - ODBD Dies: Double Stitched Rectangles, Stitched Ovals, Lattice Background, Copics, Copic Multiliner
I'm sure by now you can't wait to see which sets the Breadsticks have chosen to show you today so make sure you pop by these blogs and leave a little love for your chance to WIN!
That's all from me today, thanks for visiting and hope you are inspired to stamp! :)
Sunday, July 30, 2017
Power Poppy Hop Day!
Hello Everyone!! It's finally here - the Power Poppy Hop Day and all the sets in the Abundance Collection that have been showcased by the Bloom Brigade over the last four days are available to purchase in the store RIGHT NOW!!! WOOHOOOOO!!!! Today we have one more brand new set to tempt you, which I think may just be my favourite......UNDER GLASS!
I've used a base of white topped with Wild Wasabi and then another piece of white cut with A2 Divine Eloquence. Around these layers I've attached some green ribbon. I've stamped the image and sentiment from Under Glass in Memento Tuxedo Black onto X-press It Blending Card and coloured with Copics. I've cut this with Labels 28 and while it's still in the die, sponged a little Antique Linen ink. I've affixed this to front of the card and accented with a green bow and a few clear rhinestones.
Stamps - Under Glass (Power Poppy)
Paper - X-press It Blending Card, Wild Wasabi, White
Ink - Memento Tuxedo Black, Antique Linen
Accessories - Copics, Green Ribbon, Bow Easy, Clear Rhinestones
Let's have a peek at which of the sets the Bloom Brigade are showing off today and make sure you swing by these blogs and leave a little love!
Allison Cope
Christine Okken
Cindy Lawrence
Julie Koerber
Kathy Jones
Katie Sims
Stacy Morgan
Tosha Leyendekker
Christine Okken
Cindy Lawrence
Julie Koerber
Kathy Jones
Katie Sims
Stacy Morgan
Tosha Leyendekker
And one last thing - there's a special sale on but only until August 5th!! That's one special you won't want to miss with all this gorgeousness being released this month!! :)
That's all from me today, thanks for popping by, enjoy the hop and hope you are inspired to stamp! :)
Subscribe to:
Posts (Atom)
